Tamiya’s most recent entry in its 1/24 scale car series is the Ferrari LaFerrari. Ferrari unveiled the limited edition car at the 2013 Geneva Motor Show. The car is actually a hybrid, with batteries under the passenger cabin that are charged in several unique ways, such as excess torque from the 6,262cc 800 hp V12 engine and under-braking. When combined with the power from the electric motor, the car has a whopping 963 hp.
Tamiya’s rendition of the car is impressive. The kit comprises multiple
sprues - two black, 1 grey, 1 clear, 1 translucent red, 1 red, and 1
front fascia in red. The kit also contains a decal sheet, metal
transfers, nylon mesh for various grills and vents, rubber tires, and
masks for the front and rear glass.
The instructions follow the typical pattern for any Tamiya car build. The engine, transmission, headers, and exhaust are assembled and attached to the frame. The red here goes well with the suggested color scheme of red and black. As I painted the car yellow (more later), I probably should have hit this with yellow as well, but it does provide a nice contrast through the rear window.
Tamiya includes the batteries for the hybrid system that are placed in a recess on the underside of the vehicle. I thought this odd at first, until I noticed that the panel that would cover this is actually molded in clear plastic. This gives the modeler the option to put more detail down here and actually see it.
The next few steps see the addition of the suspension, brakes and rotors, and the full body monocoque. Note that I painted the rotors yellow here, as I chose a yellow body color for my assembly. The LaFerrari is available in red, yellow, or black. I chose yellow as I recently built the Ferrari Enzo in red, so I wanted a contrast.
The under-body is completed next. As you see, I chose to paint the clear panel over the batteries. The two silver sections are actually molded separately, so they can be painted and then glued onto the under-body. This made painting much simpler.
More detail is then added to the engine compartment. The air intake is prominent here. This is also the first instance where the nylon mesh is utilized. There are several grills or vents over the car that are covered with the nylon mesh. The instructions have a template that is used to correctly shape the mesh pieces. This is often where Tamiya will have photo etch options. There are several locations throughout the build where the optional photo etch parts would replace the kit parts. I found that pressing down with my modeling knife on the mesh worked better than trying to slice the mesh. Even with a new blade, slicing tended to pull the mesh apart.
The interior comes next. I again replaced any red with yellow, and chose to get creative with the seats. This is not how the instructions illustrate the seats, but I liked the look.
From there, the body panels, door panels, and other details come together. For the rear body panel, there are several clear parts that are then covered with a mesh decal. The instructions indicate that the parts are to be attached first, followed by the decal application. However, I had difficulty getting the decals to sit appropriately in their places so I would recommend that the decals be applied prior to the attachment of the plastic parts to the rear panel. The rear spoiler can be assembled in the retracted or extended positions. I chose the retracted position. The fit of the front body panels was typical Tamiya, with the multiple parts falling together.
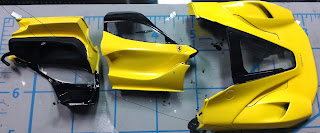
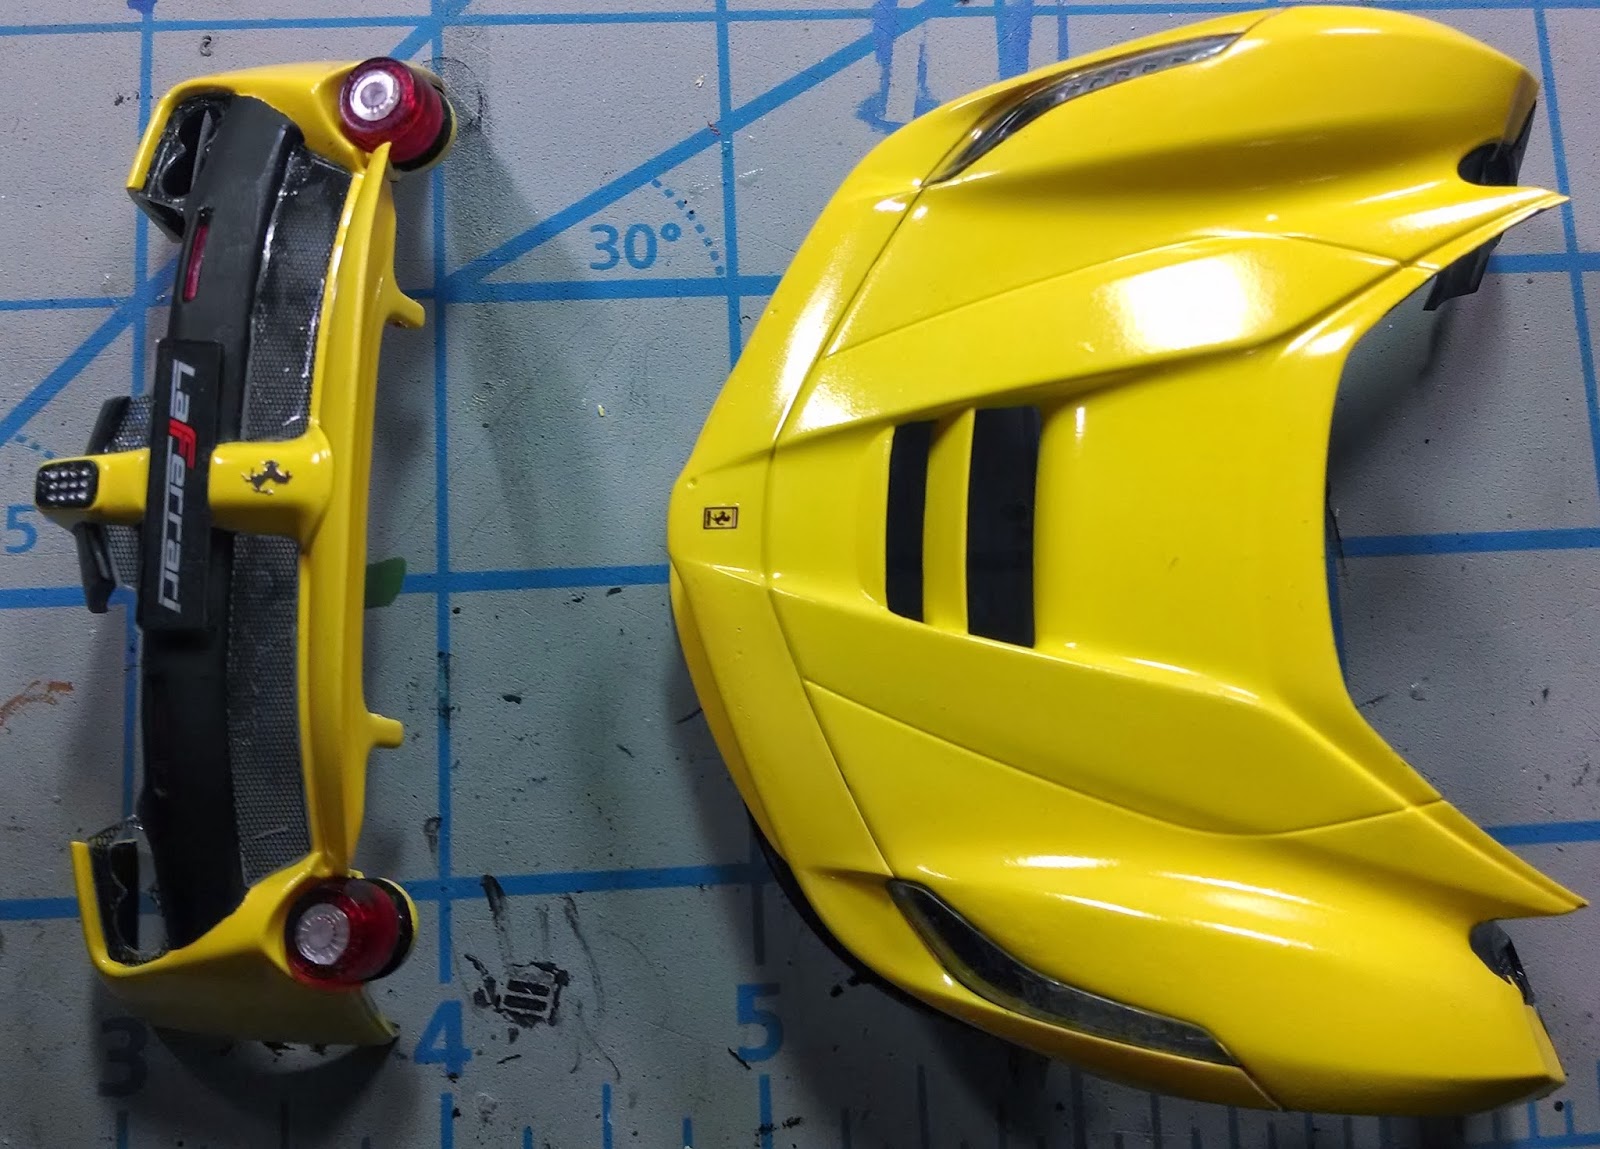
It was not until I got to the rear hatch that I started having fit issues. The venting in the rear hatch did not fit flush, as can be seen in the gaps present. With some sanding and filling, the parts would likely fit better. I doubt that this is an issue with the kit, and more with my color choice for the body. Since the kit is molded in red plastic, I had to use multiple coats of primer to cover the red followed by several coats of yellow to get a solid color. Though my coats where very thin, it was apparently enough to leave fit issues in the rear panels. Not particularly visible in the picture are additional gaps between the glass and the surrounding plastic frame of the rear hatch.

The body panels go on the frame fairly easily, but I ran into more fit issues here. A primary example would be between the hood and the door panels. Again, I can’t say that it is the kit that has the issue, but it was a first for a Tamiya kit in my experience. The wheels and exhaust are molded in red plastic, so again I painted them yellow. I would not be surprised if they are chromed in the final release of the kit, as that is often the presentation I have seen in Tamiya’s car releases.
The rear hatch has two struts to keep the engine compartment open. The doors can also be latched in the open position, though I was unable to get them to stay open long enough to take a picture.
Overall I enjoyed the kit. I think if I were to build the kit again I would stick to the kit suggested red. I might have fewer fit issues then, as the number of paint coats would be drastically reduced. With the exception of the body panels, the kit went together fantastically for me. And now for some fingerprint revealing photos. It always amazes me how a camera really brings out the fingerprints you can’t see otherwise…


Great and nice looking. I'm about to build one as I've already bought this one. I'm just thinking that whether I should repaint red as its suggested colour or leave it with the red which originally came. Could you suggest me a thing for that? Do you use photo-etched parts and carbon decal coz you did not mention in review?
ReplyDeleteYou might be able to polish the plastic sufficiently to get a nice shine on it, but better results would be achieved by painting the kit. Painting it red (or some other color that would easily cover the plastic color) should be much simpler than painting it yellow, allowing for a better finish than I was able to achieve.
DeleteI do typically use photo etch parts, but at the time of my review Tamiya had not released the set. There are some areas that I think the photo etch sets typically improve on these kits, but it depends on what Tamiya includes. I have not used carbon decals myself, but have seen them used to good effect. There are areas of this kit that would likely benefit from the application.
OMG!
ReplyDeleteYou killed this model! It's horrible.
Sorry for my honestly but you should be much to learn about this hobby.
solid effort. There are rooms for improvement but I can say the same about even the master modelers that do articles for hobby magazines. Appreciate you making this post and shedding some light on the kit, I have one sitting on my bench yet to be started and you helped identify some of the pitfalls I should watch out for.
ReplyDeleteThanks. I definitely enjoyed the build, but some of my choices led to some poor outcomes. I will be the first to admit there is (much!) room for improvement, though!
DeleteBuilding is most important. Experience comes with time. Be patient. Good luck
Delete"OMG you killed this model"
ReplyDeleteA bit harsh but there are areas that could be improved. There are numerous pictures of LaFerrari on the web so there is no excuse for getting it this wrong.
In your first picture you say as the overall colour of the model is yellow then perhaps you should have 'hit this with yellow too".. No Ferrari has ever had its cam colours 'hit' with yellow. Whatever the colour of the body the cam covers will always be either red, silver [bare metal] or black.
Picture 5, "The two silver sections are actually molded separately, so they can be painted and then glued onto the under-body" There are no 'silver sections on the under tray of LaFerrari. All is carbon fibre!
You certainly did get creative on the seats but can you imagine how that would look on a full size car?? horrific!
Yellow exhaust pipes... how long do you think they would stay yellow with the heat of 900bhp..?
So no, you didn't kill the model but you did leave it gasping for breath.
http://www.maranellominiatures.co.uk
I typed out a long response on mg phone and it didn't seem to post. The gist was that I tried to follow the instructions for the most part with the exception of the seats. I appreciate the thoroughness of your comments!
DeleteAlthough the colour scheme may not be puritan in nature , I think it was good effort especially for the internal parts paint quality. e.g. the engine and red cam covers( never yellow). As for the body , I think more work needs to be improved on sanding, spray quality/skills, polishing and waxing. Don't give up. Its a hobby which is so enjoyable and therapeutic at the same time. I am into my second Tamiya 1/24 La Ferrari. The first was sold in a display to a friend. The second is also to be sold haha.
ReplyDeleteWell I'm glad I found this blog, as I'm about to build this model myself. I find that the information and details provided on this page are excellent! Thanks to it's host who posted this 6 years ago!
ReplyDelete